
DIY Gelcoat Repair
Easy gelcoat repairs
If your boat has a case of dock rash it could be time to think about repairing and refreshing your gelcoat
DIFFICULTY
Moderate
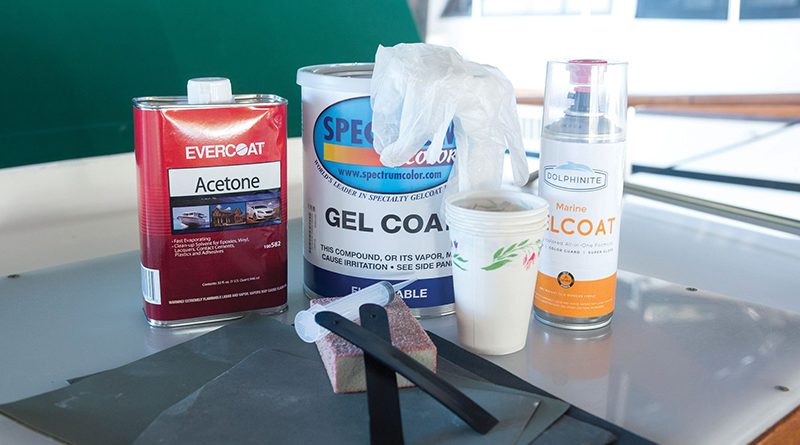
MATERIALS
Masking tape
Plastic sheet
Acetone
Gelcoat
Styrene for thinning (if spraying)
Paper towels
Clean lint-free rags
Compound and polish
TOOLS
Respirator
Latex or nitrile gloves
Dremel tool with burr-type bit
Mixing sticks
Mixing cups
Plastic spreader
Waterproof abrasive paper in various grits from 120 – 600
Sanding block
TIME
About two hours plus curing time.
COST
About $25 for materials.
No matter how careful you are, fiberglass boats collect dings and gouges over time. Many of these are minor and limited to the gelcoat – that smooth, shiny outer layer of the fiberglass layup. Shallow scratches can often be wet sanded and buffed out. But when larger cracks and gouges form, they need to be filled. In most cases, scratches in gelcoat are purely cosmetic and don’t affect the underlying integrity of the actual fiberglass, but you’ll still want to address them to prevent moisture from migrating into the laminate as well as to preserve the appearance of the boat.
BoatU.S. has discovered that many owners shy away from gelcoat repairs thinking it’s complicated and difficult. But with the correct tools and materials, the right attitude, and a little time, professional-looking repairs are within reach for the average boat owner.
Before getting into the actual repair, it’s important to understand what gelcoat is. Gelcoat is the first thing sprayed into a female mold when a boat is built, usually to a thickness of .5 to 1 mm. Depending on the method of construction, layers of chopped mat and fiberglass cloth are then built up on top to form the hull, deck, and other molded parts. When the parts are taken out of the mold, it’s the smooth, now outside layer of gelcoat that you see. Gelcoat doesn’t fully cure when it’s exposed to air, but because one side is against the mold and the other is covered by fiberglass and resin, air is excluded, and the gelcoat cures to form an impervious barrier between the water and laminate.
White is the most popular color for gelcoat, but there are other colors, too. When doing repairs, see if you can buy gelcoat from your boat’s manufacturer so you’ll know the color will match. If not, you’ll need to buy white or clear gelcoat and tint it to match. Tinting kits are available from gelcoat suppliers.
Gelcoat is thin, almost like paint, and will run, especially on vertical surfaces. Use several thin coats or use gelcoat paste that is thicker with fewer tendencies to sag. Which type you use will depend on the repair and your method of application. For vertical surfaces, I prefer spray application using several thin coats.
As mentioned, gelcoat has to be sealed from the air for it to harden properly. Otherwise it will stay tacky to the touch. For this reason, you’ll often see “waxed” and “nonwaxed” gelcoat for sale. Gelcoat that has wax added will fully cure; the wax rises to the surface after application, sealing out the air and allowing it to cure. Nonwaxed gelcoat can be used when several coats are required, but that means having two different kinds of gelcoat on hand. The simpler way is to always use the waxed kind, lightly wet-sanding the cured surface between coats.
As with all repairs, preparation is key. Just slapping on some gelcoat will give disappointing results as well as look unsightly, and the repair will probably need to be redone within a year or two. It’s better to do it right the first time.
If this is your first time repairing gelcoat, start with a fairly small repair in an inconspicuous place. Gain confidence before moving on to more visible spots on the boat.
Seaglass, my Grand Banks 32, had a small crack in the top of the forward cabin trunk that needed repairing. Here’s how I did it.
- Start by wiping down the area to be repaired with acetone to remove surface dirt, contaminants, and any surface wax that might interfere with the bond of the new gelcoat.
- Open up the crack a bit to give the repair the best chance of seamlessly blending into the existing gelcoat. This can be done using a sharp wood chisel or scraper; I prefer to use a Dremel tool fitted with a burr bit.
- It took about five minutes to create this V-shaped groove in the gelcoat. Vacuum up the dust and then wipe down the area to be repaired with an acetone-soaked rag.
TIP
If you start cutting into the laminates when opening up a crack, you’re going too deep.
- Mask off the repair, leaving about 2 inches all the way around. Use plenty of tape and a plastic sheet to protect the boat from damage and drips.
- Mix the gelcoat thoroughly following the manufacturer’s recommendations. Adding too much catalyst gives insufficient working time; too little, and the gelcoat won’t properly cure. Note that I’m using waxed gelcoat, which cures even when exposed to air.
- Use the mixing stick to run the gelcoat into the crack. Using a tapping motion ensures that there are no trapped air bubbles. Overfill the crack and leave it to cure overnight.
- After the gelcoat is cured (I gave it about eight hours), sand down the repair until it’s flush with the surrounding surface. Start with 180-grit waterproof paper wrapped around a block until the surface is flat and smooth. Then switch to 240-grit before finishing off with 400-grit, which removes any scratches left by the coarser papers.
- Remove the masking tape and plastic sheet before finishing off the repair with some cutting compound followed by a layer of wax polish. I could have done this last step by hand – it’s more than feasible for a small repair like this – but a slow-speed buffer is faster and leaves a better finish.
Spraying gelcoat
For larger repairs it’s possible to spray gelcoat. I’ve had good luck with disposable Preval sprayers available from home stores. These handy devices work just like aerosol cans, except you use them with your own paint or, in this case, gelcoat. You may need to thin the gelcoat a little with some styrene to get it to flow properly.
Safety
Protect yourself, especially from dust and fumes. Use common sense, and read and understand all the safety instructions that come with your tools and materials. Catalyst is especially noxious; avoid breathing in the fumes. Wear a respirator, Tyvek suit, and latex or nitrile gloves. If you get gelcoat on your skin, wash it off right away with soap and water. Do not use acetone. – M.C.
Resources: evercoat.com, jamestowndistributors.com, tapplastics.com, westsystem.com, preval.com
Online extra
Visit BoatU.S. YouTube https://www.youtube.com/watch?v=z2iS05vT95c to watch an in-depth webinar with Lenny Rudow on his favorite products, tips, and techniques to keep gelcoat looking great.
This article was reprinted with permission from BoatU.S. Magazine, flagship publication of the membership organization Boat Owners Association of The United States (BoatU.S.). For more expert articles and videos to make your boating, sailing, or fishing better, visit BoatUS.com